8 Steps GM MDI2 Wireless setup with diagnostic software
Knowledge share, Software Manual
GM MDI 2 wireless setup through GM MDI Manager to work with Tech2win and GDS2 diagnostic software most effectively. Detailed instructions along with notes on the equipment needed to prepare will be shared in detail in the article. Follow the content by Eurocartool in the next section.
What is GM MDI2 device?
GM MDI 2 is a favored tool among GM technicians for its efficiency in the auto repair process. It connects seamlessly with GM’s specialized software, enhancing its utility in various functions such as error diagnosis, clearing faults, viewing dynamic vehicle data, and activating actuators. Additionally, MDI 2 is adept at updating ECU software, and programming new ECUs for multiple components like PCM, ABS, airbags, and BCM, as well as key programming. This makes it a vital asset in speeding up and simplifying vehicle repairs.
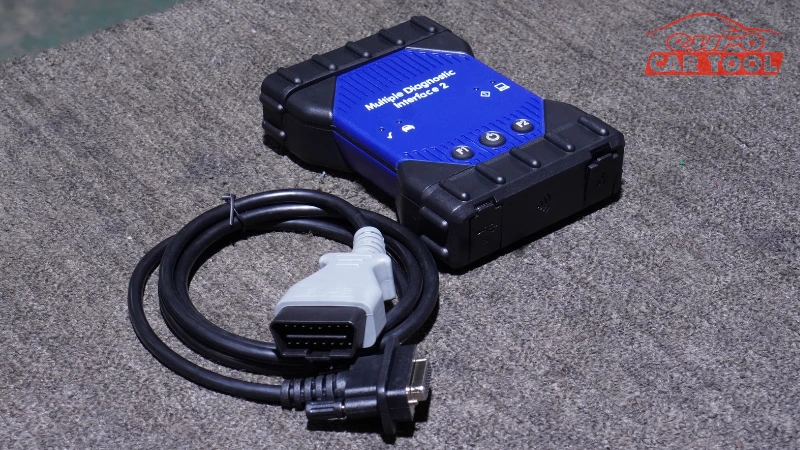
The connection protocols that MDI2 provides are very diverse, including:
| Wireless Connection | • Simple plug-and-play configuration
• Point-to-Point, Does not require an Access Point or IT support • Upgraded wireless protocol support (includes 802.11 bgn) |
| High-Speed USB 2.0
Connection |
• Improved protection from ground offset failures
• Improved USB performance (faster firmware downloads) • Reinforced USB Connector and connector housing • Device powered through USB or DLC connection (no AC adaptor required) |
| DLC Cable | Longer DLC cable (2 meters) with twisted pair wire for Global B vehicles |
| New Hardware Expansion Capabilities | Two host USB expansion ports for future peripherals
SD Memory Card slot for future software applications Programmable function buttons for future software features and applications |
GM Diagnostic Software work with GM MDI 2
Currently, there are 2 software used specifically for GM vehicles, namely Tech2win and Techline connect.
Tech2win is specialized software for reading errors, deleting errors, diagnosing, and programming support for older vehicles. from 2013 and earlier. Techline connect is diagnostic and programming software for vehicles from 2014 to the present and some models from 2011-2013.
To be able to diagnose and program the vehicle, you need software, a device and a laptop connected to the vehicle via the OBD port. With the help of these software and devices, the repair process of technicians can identify errors and repair them more quickly.
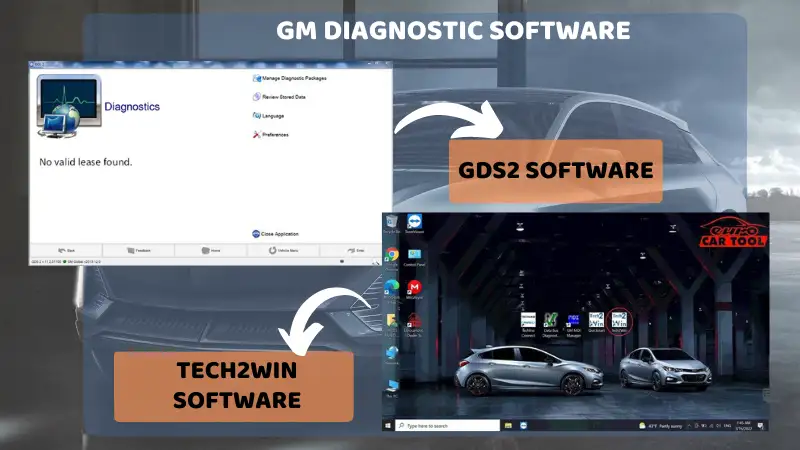
However, many technicians who are new to using this device still do not know how to connect to the software. Eurocartool will guide you through the steps below.
GM MDI 2 wireless setup steps
You need to first prepare the MDI2 device and the computer with the GM diagnostic software installed. Below are instructions for GM MDI 2 wireless setup to the software.
Step 1: Check the diagnostic device: push buttons, connectors, wires
Step 2: Turn on the computer and connect to the device
Make sure your computer is connected to the network and has a full battery inside use process.
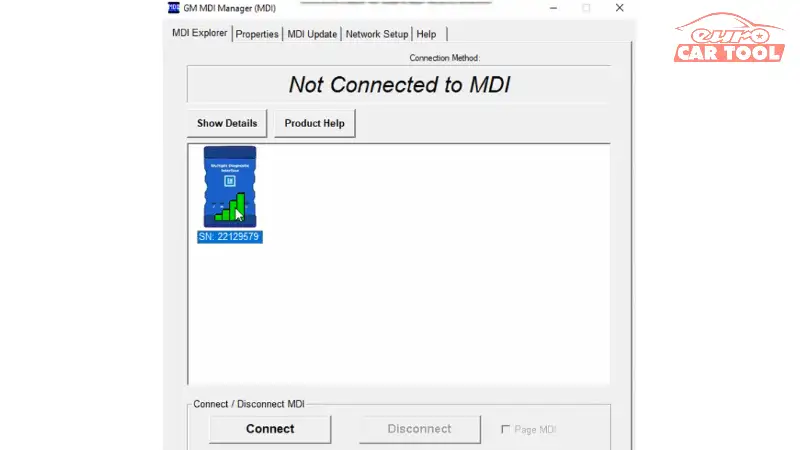
Step 3: Open GM MDI Manager software
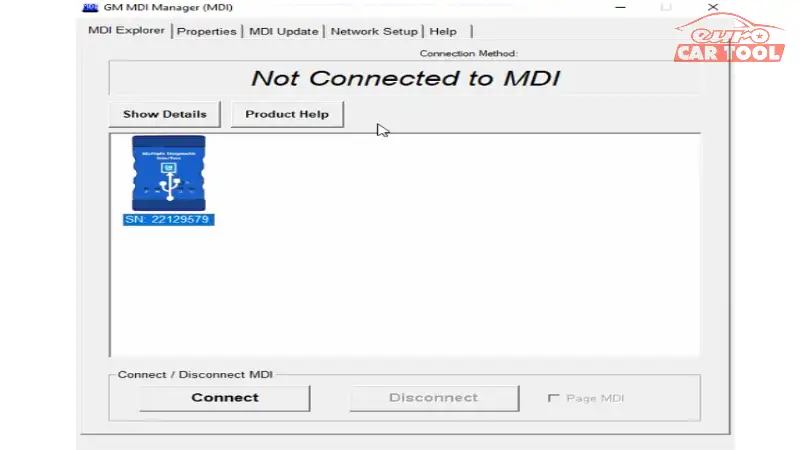
Step 4: Click on the icon of the device, then click “connect”.
Step 5: Select “Network setup”. In the interface control section, click on “Enable Wireless interface”. Then select “Access Point”
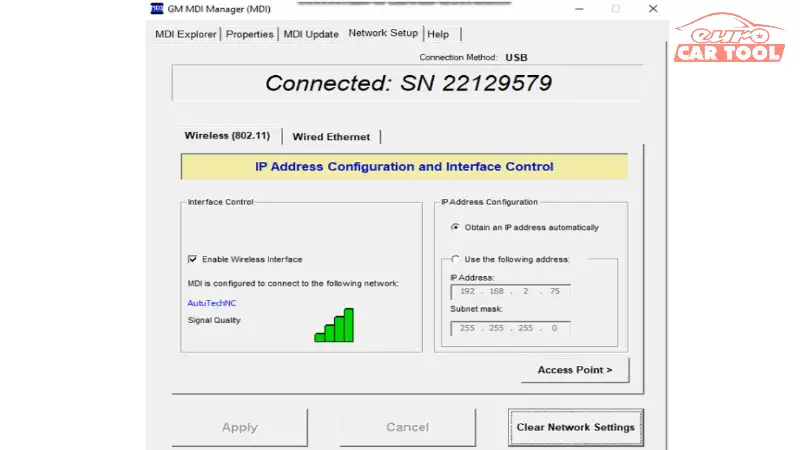
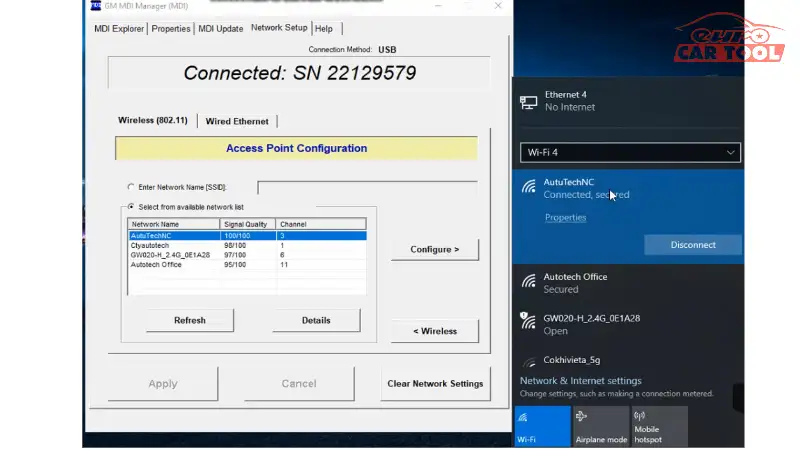
Step 6: When the Network name panel appears, select the network address that you are using the computer to connect to.
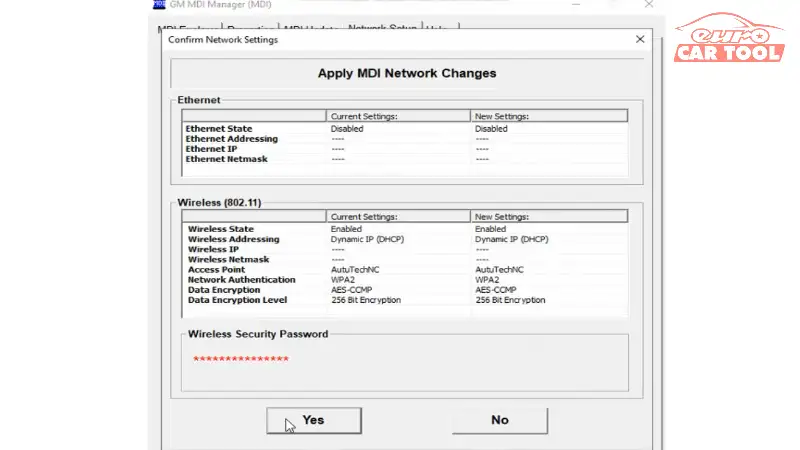
Step 7: When the Configure Wireless setting panel appears, enter the password, then press “next” and press “Yes”
Step 8: Disconnect Cable and check connect wireless
Below is one of the videos you can refer to:
Above is a guide GM MDI 2 wireless setup with diagnostic software for you. In the process of implementation, if you have problems, you can contact our technician team for the fastest support. Also, if you want to buy our software and equipment, you can chat with us via our website or WhatsApp: +13155472355.


