Instructions to fix Rear Camera error with DTS Monaco
Knowledge share, Repair Manual
Rear camera not working after you level or replace? The cause may be that you have installed it incorrectly or have not connected the control unit box on the vehicle. If you are looking for a way to fix this error, let’s find out with Eurocartool what causes the camera to not work, and how to fix the problem properly in the article below.
What is a rear camera?
A Rear Camera, also known as a rearview camera or reverse camera, is a type of video camera that lets you see objects in the rear of your vehicle when you’re backing up. This type of safety camera helps users to see all the blind spots behind to prevent collisions or accidents.
Currently, car manufacturers recommend installing backup cameras in the back of your vehicle. It gives you more visibility than just using the mirror or turning your head and looking through the car door. In addition, the backup camera gives you a wide view of what’s going on underneath the rear of the vehicle.
Why does the rear view camera not working after retrofitting?
In the event of the following problems, the backup camera system (RFK) will be interrupted by the controller, display and operating COMAND.
- Back door backup camera faulty
- The left backup light (model number 164) is faulty
- The right backup lamp (model number 251) is faulty.
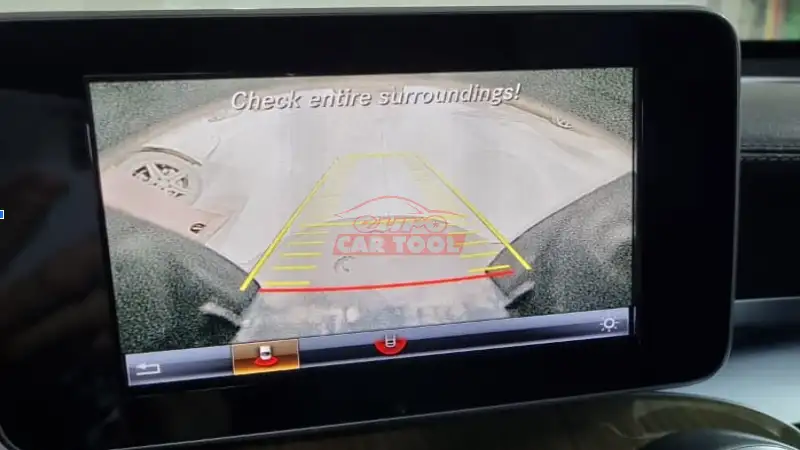
The reverse camera is installed on the left side next to the handle to open the trunk. The way it works is simple: If the driver assistance system is activated, the backup camera voltage supply module will supply voltage to the back door backup camera. The backup camera then transmits the analog video image back to the backup camera’s voltage supply component.
The backup camera’s voltage supply module repeats the video signal and transmits the video image to the controller. controller, display and controller over a screened coaxial line.
Specifically, when analyzing through technical principles, the way the reverse camera works is as follows:
The COMAND controller, display and operator is responsible for displaying the video image from the backup camera on the screen as soon as it receives the digital signal “Put reverse gear” via CAN B.
The electrical signals generated by the driver via the gear selector switch DIRECT SELECT for transmission position “R” are transmitted from the steering column module (N80) to the intelligent servo module for DIRECT SELECT via CAN C.
Then, the intelligent servo module for DIRECT SELECT will transmit the message “Reverse gear set” to the central gate control unit via CAN C, and then to the COMAND control, display and operation device via CAN C. CAN B.
The backup camera voltage supply module supplies the backup camera voltage and transmits the video image to the COMAND operator, display and control unit over a separate line. The basis for activating the backup camera voltage supply module is the digital signal “Reverse set”. The intelligent servo module for DIRECT SELECT transmits the position of the DIRECT SELECT gear selector switch to the central gate control unit via CAN C.
The central gateway controller transmits the request to turn on the left backup light (E3e3) and the right backup light (E4e3) to the rear SAM controller (N10/8), which automatically turns on the backup light.
How to coding rear camera when reverse camera not working? Let’s read below.
How to fix rear camera in car?
Prepare
Before performing troubleshooting rear view camera not working after retrofit, you need to prepare the following devices and software:
- DTS Monaco software
- C4 Doip
- Laptop diagnostic
You can refer to the computer Panasonic CF19, Panasonic CF53, … all of these computer models can with stand impacts, good heat dissipation, water, grease, and battery life up to 4 hours.
After you have all the necessary equipment, you need to connect them to the car to start the process of diagnosing and clearing the rear camera not working error.
Steps to fix rear camera is not working
Step 1: Connect the Xentry software to the car through the C4 . device
Step 2:Connect the camera control box and wire it up properly
Step 3: Need to code more camera module in the vehicle’s option in the EIS box
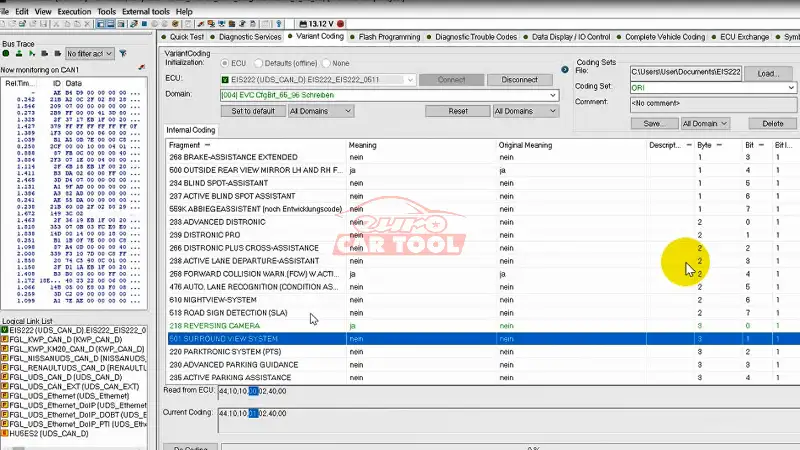
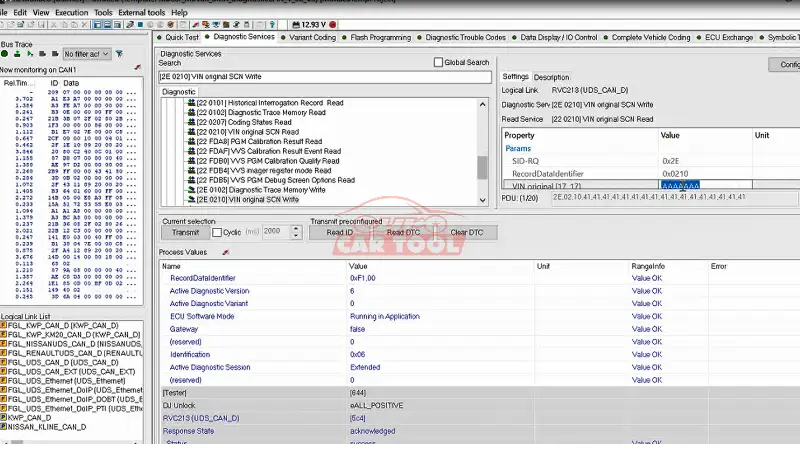
Step 4: Programming and coding RVC control box (rear camera box and chance VIN code)
Step 5: Add RVC control box feature in Headunit control box, EVC awareness has been added
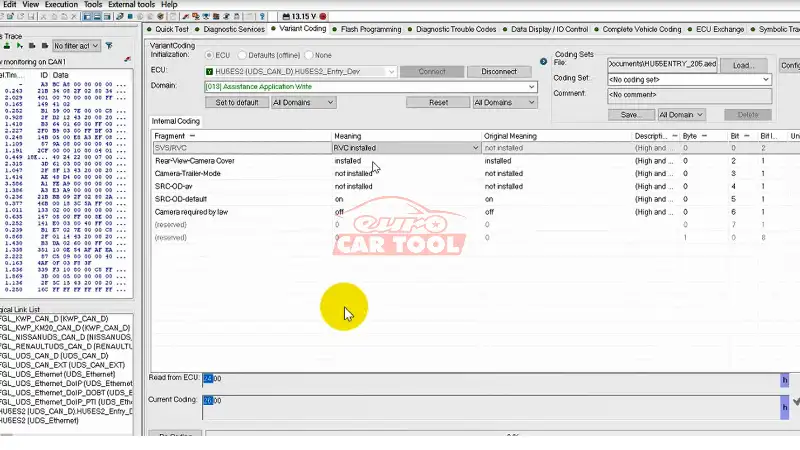
Step 6: Turn on the feature for the camera cover (the cover opens and closes to protect the camera)
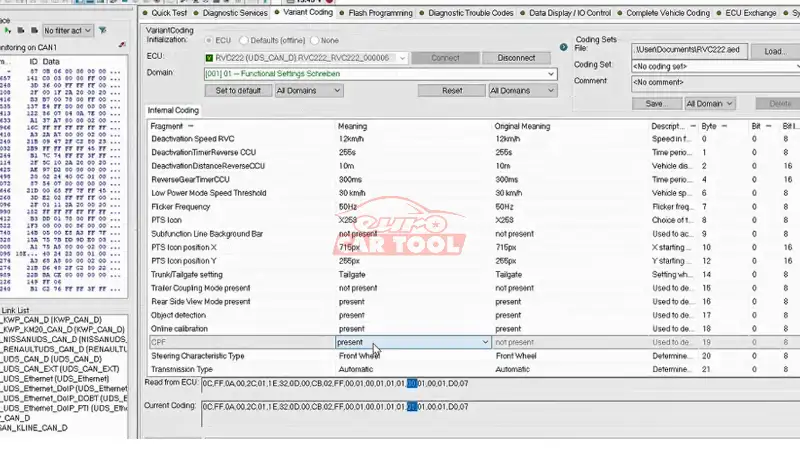
Step 7: Camera has been added successfully
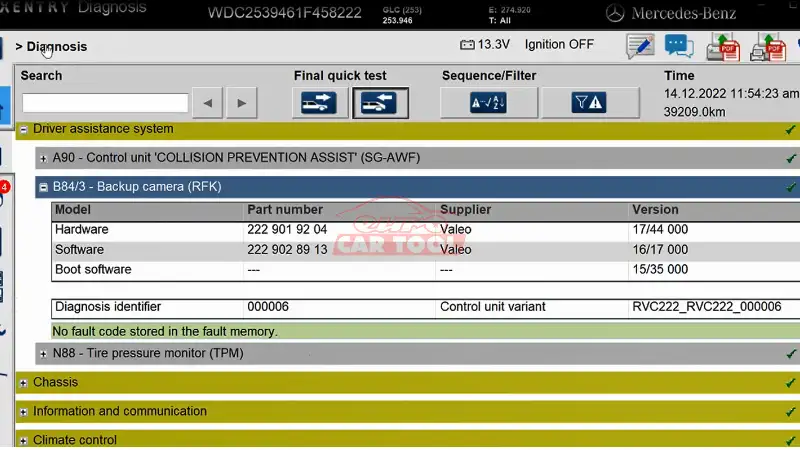
After successfully fixing, the reverse camera will work normally

With the process of fixing the reverse Rear Camera not working after retrofit, of course it is necessary to know what causes this situation to be able to embark on the repair process. And we have mentioned those reasons in the introduction above. From the information we provide, you probably know how to fix the error through the DTS Monaco software.
Contact directly via WhatsApp: +13155472355 If you have difficulty in the implementation process or need further guidance. We own a team of professionally trained technicians with many years of experience in the profession who will always be ready to assist you in troubleshooting 24/7.


