How to use GM GDS2 Software?
Knowledge share, Software Manual
How to use GM GDS2 in detail to assist technicians in performing diagnostics, debugging and other functions on GM vehicles. This article will provide you with step-by-step instructions from basic to advanced, such as how to use GM GDS2 software for Read code, Diagnostic Data, Refresh DTCs,… Sharing from Eurocartool experts will help you New and inexperienced technicians can use it fluently.
Contents
What are GM GDS2 functions?
GM GDS2 is software installed on a PC and is designed with the main function of diagnosing and repairing automotive electronic systems on vehicles. Additionally, GDS2 provides the following capabilities in multiple languages: Read codes, Read VIN, ECU part numbers, Record or display the history, Reset functions,…

How to use GDS2 Software?
In the following section, I will guide you to use the software’s functions in the most detail about diagnostic, Clear & refresh DTC, navigation, …
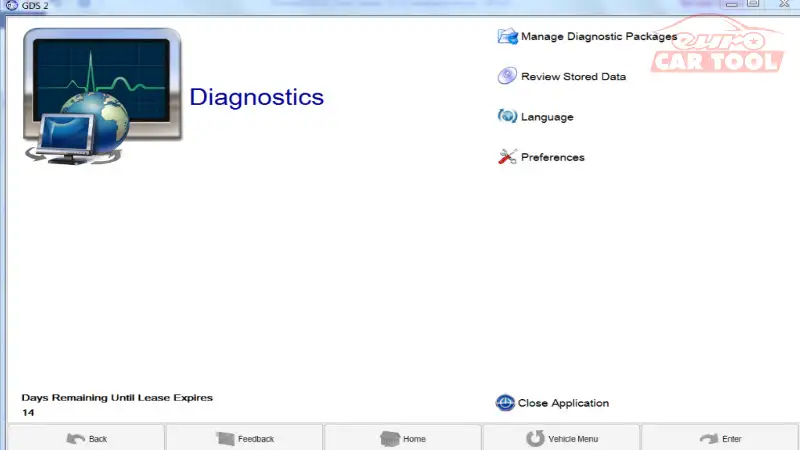
The first step you need to open GM GDS2 software, then depending on the function you want to use to select the next part.
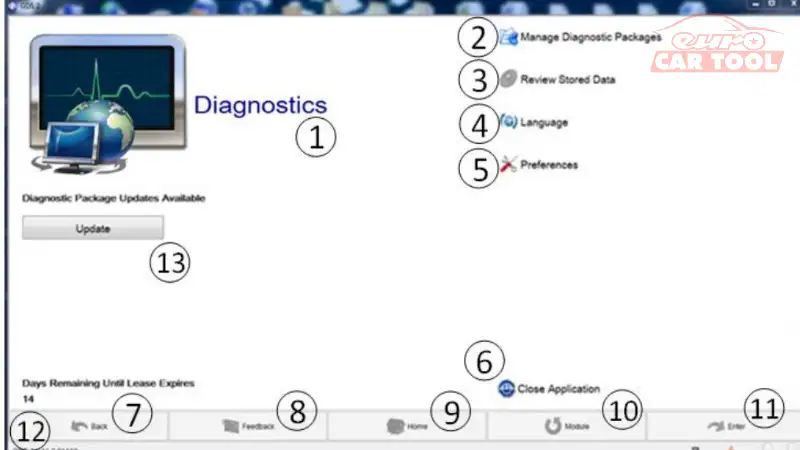
At the bottom of all GDS2 displays, there are five basic navigation options.
Selections that are not active for the current screen will be shown in grey.
Entering Vehicle / J2534 Programming Interface Tool Information
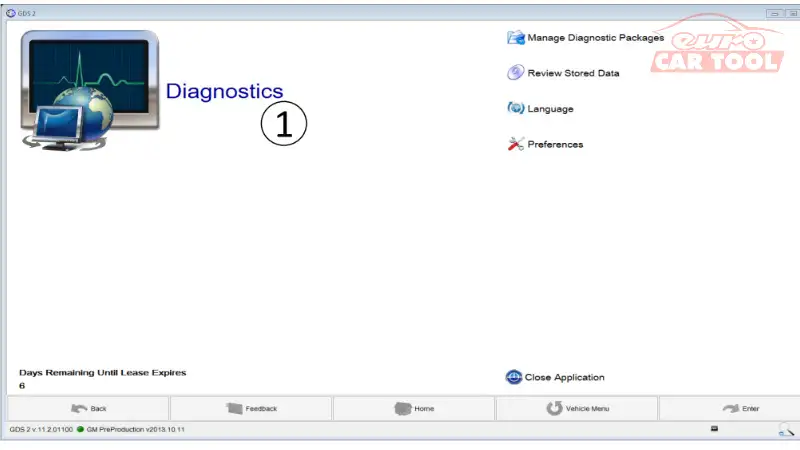
1. Select the Diagnostics icon (1) from the main application screen.
2. The Vehicle Selection Menu will be displayed.
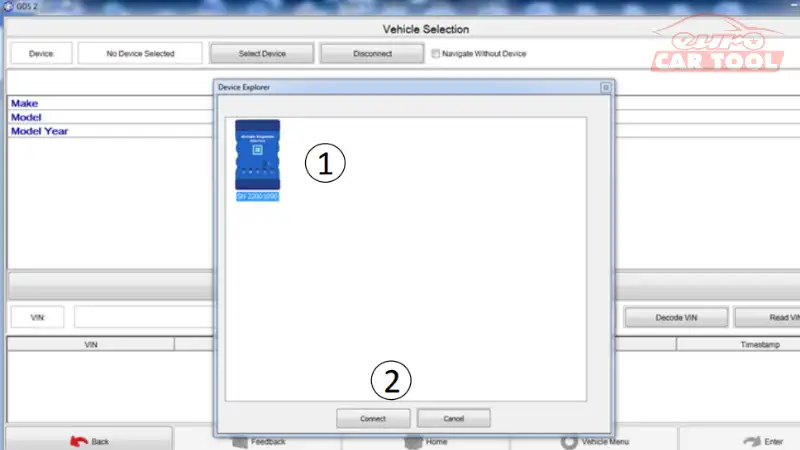
J2534 Interface Tool Selection: All J2534 interface tools accessible on the dealership’s different networks are presented. You may choose the J2534 interface tool such as GM MDI 2 that you use for car diagnostics. Highlight the available J2534 interface tool (1) by clicking on it and choosing “Connect” for the J2534 interface tool connection. Select “Select Device” to search the available networks for new J2534 interface tools.

Select “Navigate Without Device” (1) to continue GDS2 without a linked J2534 interface tool. Following a particular PC’s first connection to a J2534 interface tool, additional connections will be performed automatically when the relevant J2534 interface tool is available.
Select “Navigate Without Device” (1) to continue GDS2 without a linked J2534 interface tool. Following a particular PC’s first connection to a J2534 interface tool, additional connections will be performed automatically when the relevant J2534 interface tool is available.
VIN Entry: If the J2534 interface tool is linked to the car, the GDS2 program will instantly get the VIN number (2). Otherwise, the Vehicle Identification Number (2) may be input manually (J2534 interface tool connection needed). After entering the VIN, the Make, Model, and Model Year of the car will be shown on the screen. Select “Read VIN” (4), then “Decode VIN” (3) to read the VIN. “Timestamp” (5) indicates when the data was first viewed/stored. To continue with the diagnostics, press “Enter” (6).
Vehicle Identification Selection: If you do not wish to input a VIN, you may pick the vehicle’s Make, Model, and Model Year from a sequence of displays. You may also choose from a variety of diagnostic choices based on the functions you wish to investigate, such as Module Diagnostics, Diagnostic Trouble Codes, Identification Information, Control Functions, Configure/Reset Functions, and so on.
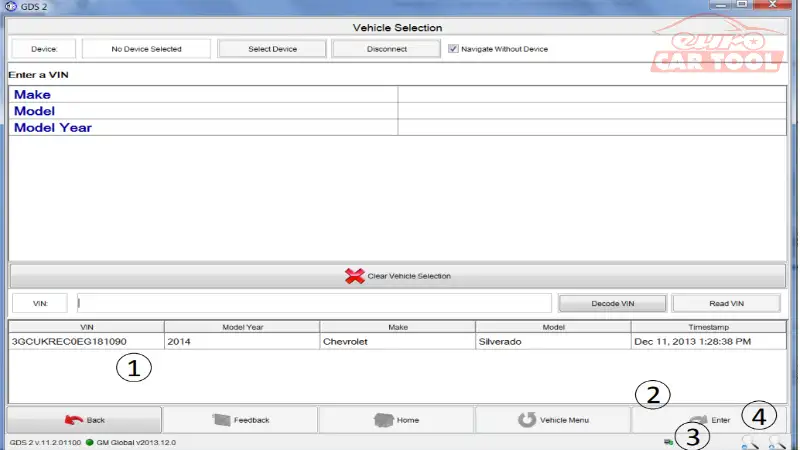
Vehicle Diagnostic History: If a vehicle has previously been diagnosed using GDS2, the VIN and related information will be saved toward the bottom of the screen. Diagnostic sessions for several VINs may be seen and saved in their entirety. Highlight the car to be diagnosed (1) and press “Enter” (2).
Diagnostic Data Display
To enter Diagnostics, select the Diagnostics icon (1) from the main application screen.

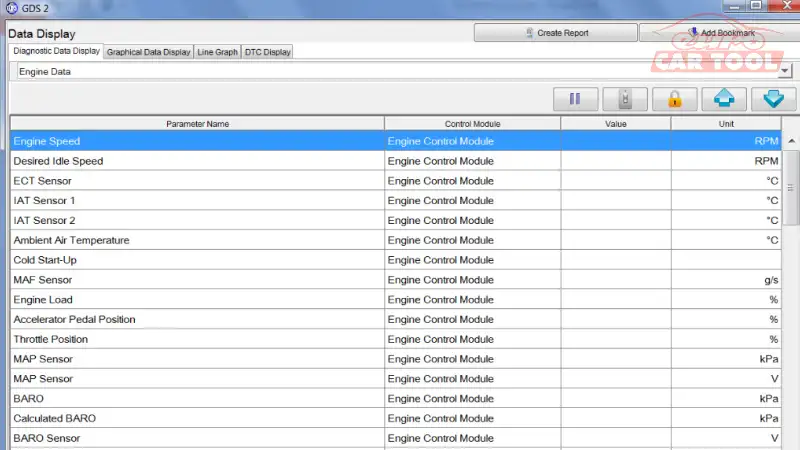
The Diagnostic Data Display program displays the status of the vehicle controller data and signals in real-time. A drop-down menu on the GDS2 Diagnostic Data Display provides access to various data lists.

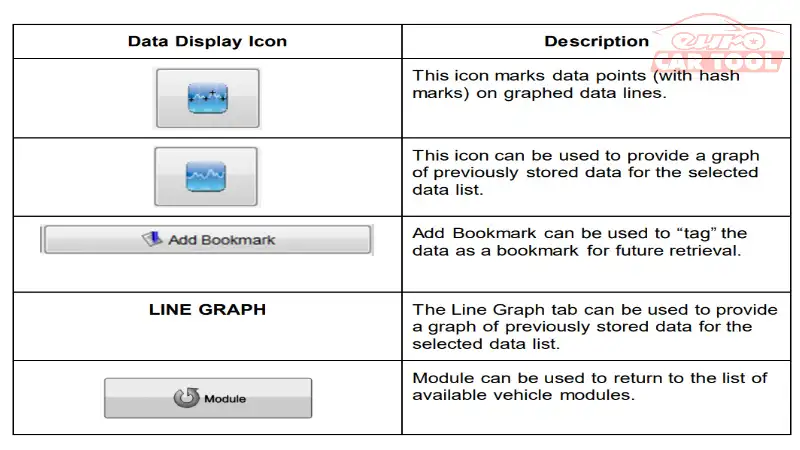
The slide below provides additional directional selections for graphical displays.

The Scroll Bar is located to the right of the graph and the drop down menu. It enables you to scroll up and down the data lists.
DTC Display
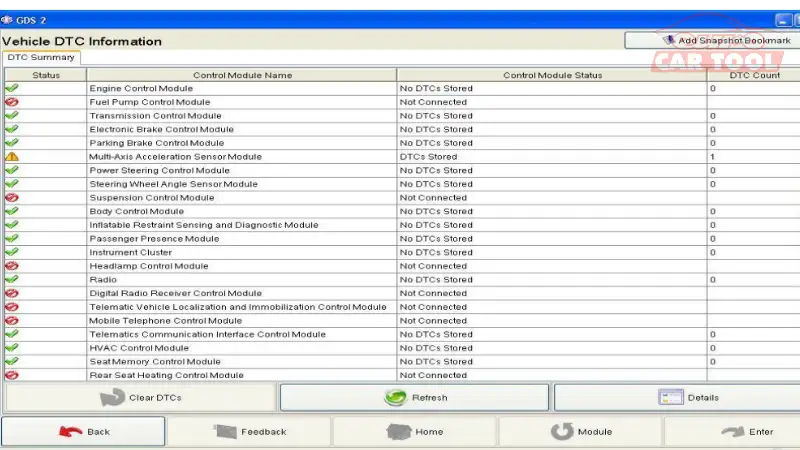
When you pick Diagnostic Trouble Codes (DTC)/DTC Display, a summary page with columns such as Control Module Name, Control Module Status, and DTC Counts appears.

Refresh DTCs
If ‘Refresh’ is chosen, GDS2 will ask the controller for a DTC update.
Details Selection
If ‘Details’ was selected, a detailed DTC display screen appears.

The top of the chart displays Control Module (1), DTC (2), Symptom Byte (3), Description (4), Symptom Description (5), and Status Byte (6). Category (7) and Decoded Value (8) are presented at the bottom of the chart. Back (9) takes you back to the DTC display.

Clear DTCs
If Clear DTCs (11) is selected, a DTC Display screen will appear.
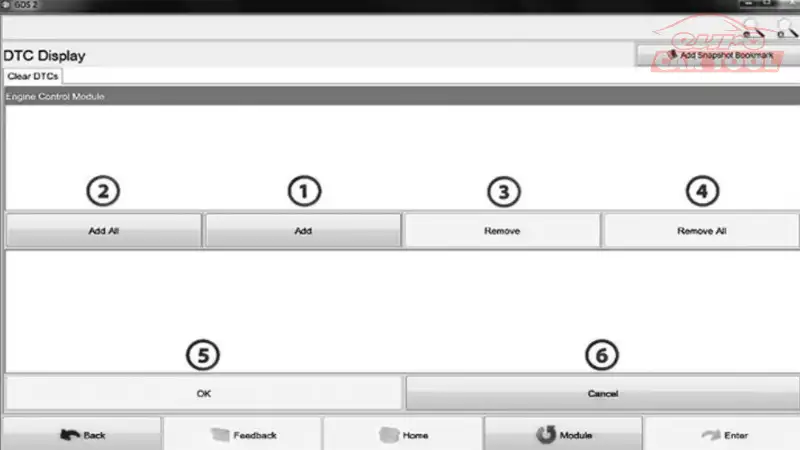
Select the ECUs you wish to clear by clicking Add (1) or Add All (2). Some ECUs can only be cleared together, hence they will be chosen together. Select Remove (3) to begin the process of removing the specified ECUs. Select Remove All (4) to begin the process of clearing all ECUs. To clear the chosen ECUs, press OK (5).
If you do not wish to clear any ECUs at this time, choose Cancel (6). If OK is chosen, a notice requesting that DTCs be cleared will display. With the next refresh, the removed codes will be gone.
Leave the DTC Application
Only the Close Application (6) option enables you to exit the Diagnostic Application altogether. GDS2 cannot be exited while diagnostic apps are being run. To exit GDS2, return to the GDS2 Application page by choosing Back (7), then Home (9) if it is available.
GDS2 Data Storage (Snapshot)
There is no traditional snapshot in GM GDS2 software, as there has been in the past. GDS2 saves the last 20 VINs and diagnostic data for later perusal. When viewing live data, the user may “tag” the data with bookmarks. Select ‘Review Stored Data’ from the GDS home page to access previously saved data.

- Select the VIN (1) for the vehicle you wish to view.
- Select Import Session (2) if you want to bring in a Snapshot file to view in GDS2.
The Snapshot file will be sent to a directory for viewing in GDS2.
- Select Snapshot (3) to display the highlighted snapshot event.

Configuration and Reset Functions
The configuration and reset operations are controller functions that must be performed when system actuators need to be changed or reset. For further information, see the system’s Service Manual.
Above are detailed instructions on how to use GDS2 software. If you have any questions during use or need advice on purchasing, please contact us via WhatsApp: +13155472355

